Drone Photography Tips
Drone photography lets you see the world from a whole new angle, which is pretty cool. If you’re looking to get some awesome shots, especially around places like Loughcrew, there are a few things you should know. It’s not just about flying the drone; you also need to understand the rules, plan your flights, and know how to use your camera. This loughcrew drone guide will help you take your pictures from okay to amazing, making sure you get those stunning aerial views safely and effectively.
Key Takeaways
- Always check local flight rules around Loughcrew before you fly to avoid problems.
- Good planning, like checking the weather and battery life, makes a big difference for your photos.
- Learning how to use your drone’s camera settings, like exposure and white balance, helps you get clearer pictures.
- Using composition tricks, such as the rule of thirds, can make your aerial photos look more professional.
- Safety first: always keep your drone in sight and know what to do if something goes wrong.
Understanding Drone Regulations
Flying a drone isn’t just about getting cool aerial shots; it’s also about knowing the rules of the sky. Ignorance isn’t an excuse, and breaking regulations can lead to hefty fines or worse. So, before you even think about launching your drone near Loughcrew, let’s get familiar with the legal landscape.
Local Flight Restrictions for Loughcrew
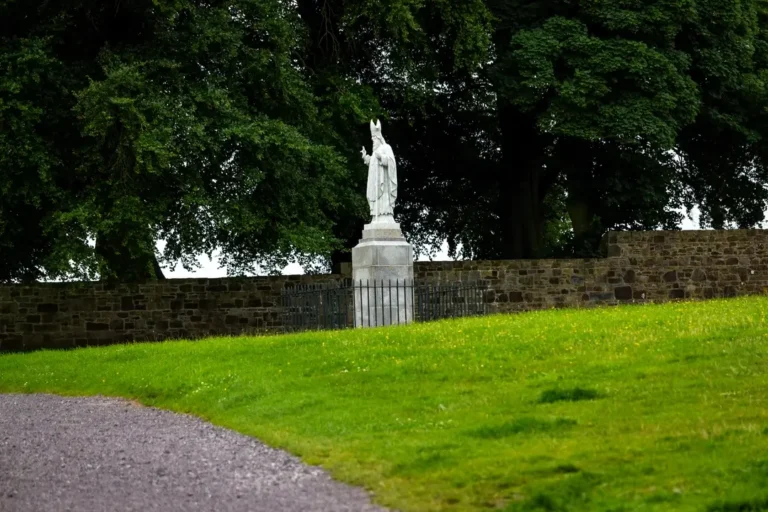
Loughcrew, with its ancient cairns and stunning landscapes, might seem like the perfect spot for drone photography. However, it’s essential to check for any local flight restrictions. These can vary depending on the time of year, special events, or specific conservation efforts. Always check with local authorities or aviation resources before flying. You can often find information on local council websites or aviation authority pages. Don’t assume that because you flew there last year, the rules are the same this year. Things change, and it’s your responsibility to stay updated. It’s also a good idea to look for drone photography tips before you go.
Adhering to No-Fly Zones
No-fly zones are areas where drone flights are strictly prohibited. These zones are typically around airports, military installations, and other sensitive locations. Flying in a no-fly zone can have serious consequences, including fines, drone confiscation, and even legal action. Use apps like B4UFLY or DJI Fly to identify no-fly zones in the Loughcrew area. These apps use your location to show restricted areas on a map. It’s better to be safe than sorry, so always double-check before you take off. Also, make sure to update your return to home settings before you fly.
Permits and Authorizations
In some cases, you might need a permit or authorization to fly your drone, even if it’s not in a designated no-fly zone. This is especially true for commercial drone operations or flights in controlled airspace. The process for obtaining a permit can vary depending on the location and the nature of your flight. Start by contacting the local aviation authority or the land owner. Be prepared to provide information about your drone, your flight plan, and your qualifications as a drone pilot. Getting the necessary permits and authorizations can take time, so plan ahead and don’t wait until the last minute.
It’s important to remember that drone regulations are constantly evolving. What’s legal today might not be legal tomorrow. Stay informed about the latest rules and regulations to avoid any unpleasant surprises. Check official sources regularly and consider joining a drone pilot association to stay up-to-date on the latest developments.
Here’s a quick checklist to ensure you’re compliant:
- Check local flight restrictions.
- Identify and avoid no-fly zones.
- Obtain necessary permits and authorizations.
- Stay updated on the latest regulations.
- Respect privacy and avoid flying over private property without permission.
Pre-Flight Planning and Preparation
Okay, so you’re itching to get your drone up in the air around Loughcrew? Awesome! But hold your horses, there’s some prep work to do before you even think about launching. Trust me, a little planning goes a long way in avoiding headaches (and potential drone crashes) later on. I learned that the hard way after almost losing my drone in a tree last year. Not fun.
Scouting Locations Around Loughcrew
Before you head out, do some virtual scouting. Google Earth is your best friend here. Seriously, spend some time exploring the area around Loughcrew from above. Look for interesting landmarks, potential hazards (like power lines or tall trees), and good spots to take off and land. It’s way better to have a plan than to show up and wander around aimlessly. I usually mark a few spots on my phone so I know where I’m going. It also helps to check for any recent construction or changes to the landscape that might not be visible on older satellite images. This can save you from unexpected surprises when you arrive.
Checking Weather Conditions
Weather can make or break a drone flight. Don’t even think about flying if there’s a storm brewing or the wind is howling. Download a reliable weather app that gives you detailed information about wind speed, visibility, and precipitation. I use one that also shows forecasts specifically for drone flying, which is super helpful. Here’s a quick guide:
| Weather Condition | Impact on Drone Flight |
|---|---|
| High Wind | Reduced stability, increased battery drain |
| Rain | Risk of electrical damage, poor visibility |
| Fog | Limited visibility, potential disorientation |
| Extreme Cold | Reduced battery life, potential component failure |
Always err on the side of caution. If the weather looks questionable, postpone your flight. It’s not worth risking your drone or your safety. I’ve had to cancel flights more times than I can count, but I’d rather be safe than sorry.
Battery Management and Charging
This one’s a no-brainer, but it’s worth repeating: make sure your batteries are fully charged before you leave home. And I mean all of them. There’s nothing worse than getting to a great location and realizing your batteries are dead. I usually bring at least three batteries with me, just in case. Also, remember that cold weather can significantly reduce battery life, so keep your batteries warm if you’re flying in chilly conditions. Here’s my battery checklist:
- Charge all batteries to 100% the night before.
- Bring extra batteries (at least two).
- Store batteries in a warm place if flying in cold weather.
- Check battery health in the drone app before each flight.
Don’t forget to check local flight restrictions before you go. It’s always better to be safe than sorry!
Mastering Drone Camera Settings
It’s easy to get caught up in the excitement of flying, but don’t forget the camera! The quality from a drone camera might not match your DSLR, but you can still get amazing shots with the right settings. Let’s dive into how to make the most of your drone’s camera.
Adjusting Exposure for Aerial Shots
Getting the right exposure is key. Start by using the +/- EV compensation in auto mode. Shifting to – EV will darken the shot and + will lighten the shot. The controller screen gives you real-time feedback, so use it!
- Keep ISO as low as possible to reduce grain.
- Make sure your drone is hovering still for any longer shutter speeds.
- Enable the histogram to see how your highlights and shadows are doing.
It’s worth noting that what you see on your controller screen isn’t always what you get when you view the images on your computer. Always check your histogram to ensure proper exposure.
Utilizing White Balance Effectively
White balance is all about getting colors right. Auto white balance can work in many situations, but sometimes it gets confused, especially with tricky lighting. Experiment with different presets like ‘Sunny’, ‘Cloudy’, or ‘Fluorescent’ to see what looks best. If you’re shooting in RAW, you can always adjust white balance later in post-processing, but getting it close in-camera saves time.
Choosing the Right Resolution
Resolution affects image quality and file size. Shooting at the highest resolution gives you the most detail and flexibility for cropping and editing. However, bigger files take up more space on your memory card and can slow down your workflow. Consider your needs. If you plan to print large photos or do heavy editing, go for the highest resolution. If you’re mainly sharing online, a lower resolution might be sufficient. Here’s a quick guide:
| Resolution | Use Case |
|---|---|
| High | Printing, heavy editing, detailed shots |
| Medium | General use, online sharing |
| Low | Quick sharing, saving storage space |
Once you feel more confident, switch to Pro mode to have full control of the shot. This will give you full control of the shutter speed, ISO, and white balance settings (aperture is fixed, however).
Composition Techniques for Aerial Photography
Applying the Rule of Thirds
The rule of thirds is a simple but effective guideline. Imagine your image divided into nine equal parts by two horizontal and two vertical lines. Place key elements along these lines or at their intersections to create a more balanced and engaging composition. It’s a classic technique that works wonders in aerial photography, helping to avoid static, centered shots. Think about where you’re placing the horizon, or a prominent feature like a building or a lake. It can make a big difference.
Finding Leading Lines in Landscapes
Leading lines are natural or man-made features that draw the viewer’s eye into the image. Roads, rivers, fences, or even shadows can act as leading lines. Use them to guide the viewer through the landscape and towards your subject. From above, these lines can create stunning patterns and add depth to your photos. It’s all about finding those visual pathways that make the image more dynamic. For example, a winding road can create a sense of journey and exploration. Planning your shoot to capture these elements can really improve your drone photography.
Exploring Unique Perspectives
One of the biggest advantages of drone photography is the ability to capture perspectives that are impossible from the ground. Don’t be afraid to experiment with different angles and heights. Look for patterns, textures, and shapes that might not be obvious at ground level. Sometimes, flying lower can be more effective than flying high.
Think about how the height affects the depth of field and the distances between objects. Experiment with different altitudes to see how the landscape changes. You might be surprised at what you discover.
Here are some ideas to get you started:
- Shoot straight down for abstract patterns.
- Use a low angle to emphasize a subject against the sky.
- Look for symmetry and repeating elements.
Safe Drone Operation Practices
Flying a drone can be a lot of fun, but it’s super important to do it safely. You don’t want to crash your drone or, even worse, hurt someone. Here’s what I’ve learned about keeping things safe when I’m out flying.
Maintaining Visual Line of Sight
Always keep your drone where you can see it without using binoculars or other devices. It’s tempting to let it fly far away, but that’s when things can go wrong quickly. If you lose sight of it, you might not be able to avoid obstacles or react to changing conditions. I try to stay within a few hundred feet, depending on the environment. It’s also a good idea to have a spotter with you, especially in complex environments. They can help you keep an eye on the drone while you focus on the camera.
Understanding Drone Capabilities
Know what your drone can and can’t do. What’s its maximum flight time? How does it handle wind? What are its limitations in different weather conditions? I made a mistake once by flying too far in strong winds, and it almost didn’t make it back. Now, I always check the weather forecast and wind speed before taking off. Also, make sure you understand all the overall drone tips and features, especially the safety features like return-to-home.
Here’s a quick table of things to consider:
| Feature | Consideration |
|---|---|
| Battery Life | Plan your flight accordingly |
| Wind Resistance | Avoid flying in high winds |
| Obstacle Avoidance | Don’t rely on it completely; stay vigilant |
| Return to Home | Set the correct altitude for your area |
Emergency Procedures
Have a plan for what to do if something goes wrong. What if you lose connection with the drone? What if the battery gets low unexpectedly? What if it starts to fly away on its own? I always practice the return-to-home function before each flight, so I know it works. I also have a checklist of emergency procedures in my flight bag. It’s better to be prepared than to panic in the moment.
It’s a good idea to create a pre-flight checklist. This helps ensure you don’t forget anything important before taking off. Include things like checking battery levels, calibrating the compass, and verifying that all the propellers are securely attached. A little preparation can go a long way in preventing accidents.
Here are some emergency procedures to consider:
- Lost Connection: Immediately activate return to home.
- Low Battery: Land the drone as soon as possible.
- Flyaway: Try to regain control or initiate an emergency landing.
- Obstacle Collision: Assess the damage and land safely.
Post-Processing Your Drone Photos
No drone photo is really done until it’s been edited. It’s where you can really make your images pop. I’m not talking about heavy manipulation, but rather the standard adjustments that can take a good photo and make it great. Let’s look at some key areas.
Enhancing Colors and Contrast
Color and contrast adjustments are your bread and butter. They can dramatically change the mood and feel of your photos. Often, drone images can look a little flat straight out of the camera, so boosting the contrast a bit can add some much-needed depth. As for colors, it’s all about finding a balance. You want them to be vibrant, but not so much that they look unnatural.
Here’s a simple workflow I often use:
- Start with contrast: Increase it slightly to add definition.
- Adjust saturation: Boost the colors, but be careful not to overdo it.
- Tweak individual colors: Use HSL (Hue, Saturation, Luminance) sliders to fine-tune specific colors like blues in the sky or greens in the landscape.
Cropping and Straightening Images
Cropping isn’t just about fixing wonky horizons; it’s also a powerful tool for improving composition. Sometimes, the perfect shot needs a little reframing to really shine. Straightening is a must, especially with drone shots where it’s easy to get a slightly tilted horizon. A subtle crop can also help draw the viewer’s eye to the main subject.
Noise Reduction Techniques
Even at low ISO settings, drone cameras can produce images with noticeable noise, especially in darker areas. This is because of the small sensor size. Noise reduction is key to getting clean, crisp images. One technique I’ve found useful is image stacking. The drone takes five consecutive shots quite quickly using the same settings. The resulting images should be almost identical. What you probably won’t be able to see though upon first inspection is that each of the images will have a different underlying noise pattern.
Noise reduction is a balancing act. Too much, and you’ll lose detail; too little, and the noise will be distracting. Experiment to find the sweet spot for each image. Also, consider using burst mode to capture multiple images and then stack them in post-processing to reduce noise. This works because the noise pattern is different in each image, so averaging them out can significantly reduce noise.
Advanced Drone Photography Tips
Capturing Panoramas and Timelapses
Drone photography opens up some cool possibilities beyond single shots. Panoramas let you capture a wider field of view than a standard lens, and timelapses compress long periods into short, engaging videos. For panoramas, plan your flight path carefully to ensure consistent overlap between shots. Use software to stitch the images together seamlessly. For timelapses, stability is key; use a stable hover or set waypoints for consistent movement.
Utilizing ND Filters for Motion Blur
ND (Neutral Density) filters are like sunglasses for your drone’s camera. They reduce the amount of light entering the lens, which allows you to use slower shutter speeds, even in bright conditions. This is super useful for creating motion blur effects, like silky smooth water or blurred car trails. Experiment with different ND filter strengths to achieve the desired effect. A general guide:
| Light Condition | Suggested ND Filter |
|---|---|
| Bright Sunlight | ND16 or ND32 |
| Overcast | ND4 or ND8 |
| Sunset/Sunrise | ND2 or ND4 |
Shooting in RAW Format
Shooting in RAW format gives you way more flexibility when editing your drone photos. Unlike JPEGs, which compress the image and discard data, RAW files retain all the information captured by the sensor. This means you can adjust exposure, white balance, and colors without losing image quality. It does mean larger file sizes, so make sure you have enough storage on your luxury chauffeur services drone and computer.
RAW files might seem intimidating at first, but the extra control they offer is worth the learning curve. Think of it as having the digital equivalent of a film negative – you can develop it in countless ways to achieve your vision.
Here are some reasons to shoot in RAW:
- Greater dynamic range
- More control over white balance
- Better shadow and highlight recovery
Want to take your drone pictures to the next level? Our website has even more cool tricks and easy-to-follow guides. Check out our full guide on advanced drone photography to really make your shots stand out!
Conclusion
So, there you have it. Drone photography is pretty cool, and with a little practice, you can get some really nice shots. Remember to keep flying, try new things, and just have fun with it. The more you fly, the better you’ll get. It’s all about getting out there and seeing what you can create from a new view.
Frequently Asked Questions
What’s the most important thing to know about flying my drone near places like Loughcrew?
Before you fly your drone, you should always check the local rules. Some places, like historical sites such as Loughcrew, might have special rules about flying drones. It’s super important to know where you can and cannot fly to avoid trouble and keep everyone safe.
Does the weather really matter when I’m taking drone photos?
Yes, weather plays a big role! Strong winds can make your drone hard to control, and rain can damage it. Always check the weather forecast before you take off. Clear skies and calm winds are best for getting great photos.
How can I make my drone photos look professional?
To make your drone photos look their best, you’ll want to play with the camera settings. Things like adjusting how bright or dark the picture is (exposure) and making sure the colors look natural (white balance) can make a huge difference. Think of it like drawing a picture – you pick the right colors and how much light you want.
What’s a simple trick to make my drone photos look better?
A good way to make your photos more interesting is to use the ‘Rule of Thirds.’ Imagine your picture is split into nine equal boxes by two lines going across and two lines going down. Try to put important things in your photo where these lines cross. This makes your pictures look more balanced and pleasing to the eye.
Is it okay to fly my drone really far away?
It’s super important to always keep your drone in sight when it’s flying. This means you should be able to see it with your own eyes, not just on a screen. This helps you avoid hitting things and keeps your drone safe.
What should I do after I take my drone pictures?
After you take your photos, you can make them even better using editing software. You can brighten colors, make dark parts lighter, and even fix crooked pictures. This step helps your photos pop and look amazing.